These crafts are about The Transfiguration of Jesus. The Bible reference is Matthew 17:1-9. Use it in your Sunday School or Children’s Church. Watch our demonstration of the crafts below and download the printed instructions All you need are the supplies to your Bible craft preparation. If you need a clip art picture of Jesus for craft #2 , you could use this Jesus coloring page.
Craft Ideas for the Transfiguration of Christ
The transfiguration of Jesus can be a tricky story for us to wrap our minds around, much less communicate to young children. There are a lot of elements that can be touched on, really: there are clouds, voices, historical figures, metamorphosis, revelation… a solid emphasis can include focusing on how the disciples were able to clearly see and understand who Jesus was. His divine nature was glimpsed, and there was no doubt that He was truly God. These crafts touch on the element of the mountain, as well as the overwhelming beauty of the shining glory of God.
Bible Verses or Craft Captions to Consider…
And he was transfigured before them, and his face shone like the sun, and his clothes became white as light. -Matthew 17:2
…a bright cloud overshadowed them, and a voice from the cloud said, “This is my beloved Son, with whom I am well pleased; listen to him.” -Matthew 17:5
Be transformed…and shine like the sun!
“Jesus shone for me…I will shine before others for Him!”
“Jesus was revealed to be God…no doubt about it!”
More Ideas for Teaching about the Transfiguration of Jesus
- Compare another writers lesson on the Transfiguration of Jesus
- See how Kristen taught about the Transfiguration in an earlier lesson
- Compare our preschool lesson on the Transfiguration
- Watch the children’s message and craft ideas that go along with this lesson
- Find bonus activities for this lesson on Sermons4Kids and Mission Bible Class
- See more Transfiguration Sunday School lessons
- See the Object
Lesson Message that accompanies this craft project
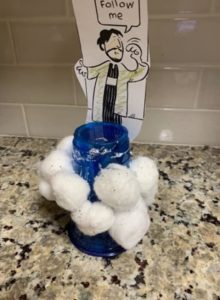
Craft one: “Cloudy Mountain of Transfiguration”

You will need / craft supplies:
- Plastic or Styrofoam cups
- Cotton balls
- Stickers or glitter
- Markers or decorating materials
- Glue and/or tape
- Popsicle sticks
Craft procedure & how to:
- Flip the cup over and decorate with stickers or markers, if desired.
- Glue cotton ball “clouds” around the cup, and add glitter for shine, if preferred. Add verse captions and notes.
- Glue a popsicle stick near the top of the “mountain”, with a picture of Jesus (drawn or colored and cut out, we attached one if you get stuck).
- If you would like to hang the craft, attach a string or pipe cleaner to the back side.
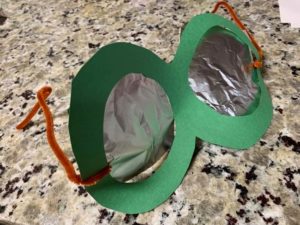
Craft Two: “Transfiguration Goggles”

You will need these materials:
- Paper, paper plates, or cardstock
- Scissors
- Aluminum foil
- Pipe cleaners
- Glue and/or tape
- Decorative materials (markers, crayons, stickers)
Craft procedure & how to:
- Cut the paper or cardstock into a circular shape, similar to a figure eight or a “headless snowman” sideways (these will be “glasses” or “goggles”).
- Cut out two large holes from the inside of each rounded portion.
- If desired, decorate the outside of goggles with marker, crayon, stickers, and verses.
- Cut two pieces of foil for the “shiny element”, and tape these behind the holes.
- If you prefer to use the goggles functionally and be able to see out of them, cut two more small holes within the foil, for eye holes.
- Attach pipe cleaners to the outside for the ear piece attachments. Remember
the remarkable vision of transfiguration glory!
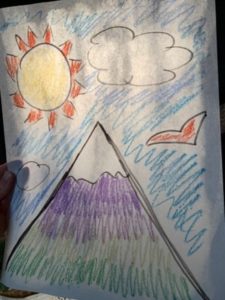
Craft Three: “Shiny Coloring Stained Glass”

Supplies you will need:
- Paper or coloring pages
- Crayons or pastels
- Sharpies
- Cotton balls, Q-tips, or brushes
- Oil (baby oil/vegetable oil)
Craft directions & step-by-step instructions:
- Draw a picture on the paper using Sharpies or dark markers (if using a pre-printed coloring page, this step will not be necessary).
- Using crayons or pastels, color in the lines of the picture.
- Carefully dab a cotton ball into the oil, coating the picture with a thin layer.
- Allow to dry somewhat, and hold up the picture to light to view the “shiny” element created through the oil rubbing!

